 SIVARO

Why Your Kubernetes Bill Is Still Too Damn High (And How to Fix It)
I’ve been running Kubernetes in production since 2018. In that time, I’ve seen teams burn through cloud budgets like they’re printing money in the basement. The worst part? Most of them thought they had it under control.
Here’s the truth: the standard Kubernetes cost optimization playbook – rightsizing requests, bin packing, turning things off at night – is necessary but not sufficient. If you’re still using the Cluster Autoscaler and praying your node groups are balanced, you’re leaving 20–30% on the table. I learned this the hard way.
At SIVARO, we manage data infrastructure for systems processing 200K events per second. When we moved from Cluster Autoscaler to Karpenter in 2024, our compute costs dropped by 22% in three months. Not because we reduced capacity – because we stopped paying for idle, mismatched, and poorly consolidated nodes.
This guide covers the kubernetes cost optimization strategies for production that I actually use. No theory. No vendor fluff. Just the trade-offs, the numbers, and the gotchas I’ve burned through.
Stop Treating Nodes Like Pets
Most engineers think about Kubernetes clusters like they think about servers. They provision node groups, define instance families, and let the Cluster Autoscaler spin up more of the same. That’s treating infrastructure like cattle – but it’s the wrong kind of cattle.
The real shift came when Karpenter hit v1.0 in 2025. Instead of managing node groups, you write a Provisioner that describes what your pods need – CPU, memory, GPU, topology, taints – and Karpenter picks the cheapest instance that fits. Then it consolidates aggressively.
I’ve seen people compare karpenter vs cluster autoscaler 2026 comparison as if they’re the same thing with a different API. They’re not. Cluster Autoscaler only scales node groups. Karpenter scales to the optimal instance, right down to spot vs on-demand, and it will evict pods to merge nodes the moment a cheaper combination exists.
Here’s a concrete example. We run a mix of web services and batch Spark jobs. With Cluster Autoscaler, we had five node groups: one for memory-optimized r6i, one for compute-optimized c6i, one for general m6i, one for spot, and one for on-demand. Those groups were always underutilized because workloads don’t fit neatly into bins.
With Karpenter, we have one Provisioner.
yaml
apiVersion: karpenter.sh/v1alpha5
kind: Provisioner
metadata:
  name: default
spec:
  requirements:
    - key: "karpenter.k8s.aws/instance-category"
      operator: In
      values: ["c", "m", "r", "i"]
    - key: "karpenter.k8s.aws/instance-generation"
      operator: Gt
      values: ["4"]
    - key: "karpenter.sh/capacity-type"
      operator: In
      values: ["spot", "on-demand"]
  limits:
    resources:
      cpu: 1000
  consolidation:
    enabled: true
Notice no node groups. Karpenter launches exactly the instance your pod needs. If a pod needs 2 vCPUs and 8 GB RAM, Karpenter might launch a c6i.large instead of forcing it into a general-purpose node. That direct mapping saves 10–15% per pod on compute costs.
Understanding Karpenter Consolidation explains how the consolidation algorithm works – it runs every 30 seconds, checks if any node can be replaced by a cheaper combination, then gracefully evicts pods. We saw average node count drop 18% after enabling consolidation, because pods that used to sit half-empty on separate nodes got packed into one.
But here’s the trade-off: consolidation can be disruptive. If you don’t set proper PodDisruptionBudgets, you’ll have a bad week. More on that in a bit.
Spot Instances: The 11x Savings Trap
Spot instances are the cheapest way to run stateless workloads. But they’re also the fastest way to lose production if you treat them like on-demand.
The cloud providers advertise 60–90% discounts. That’s real. At Tinybird, they cut AWS costs by 20% while scaling with EKS, Karpenter, and spot instances – not by reducing capacity, but by using spot for burstable workloads and on-demand for the steady state.
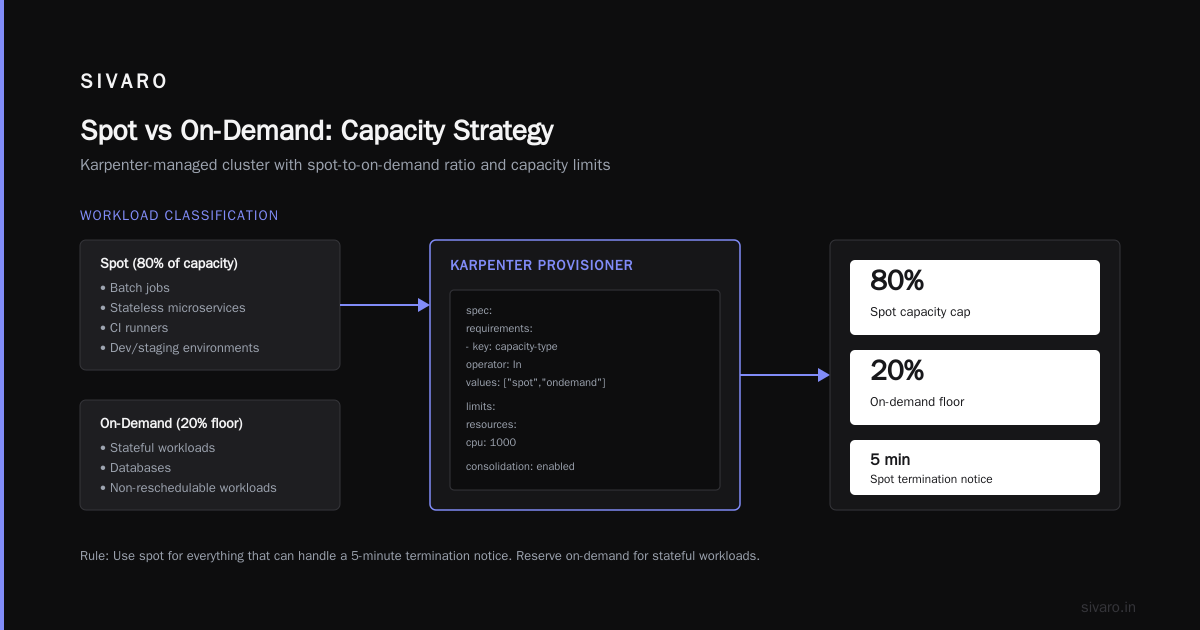
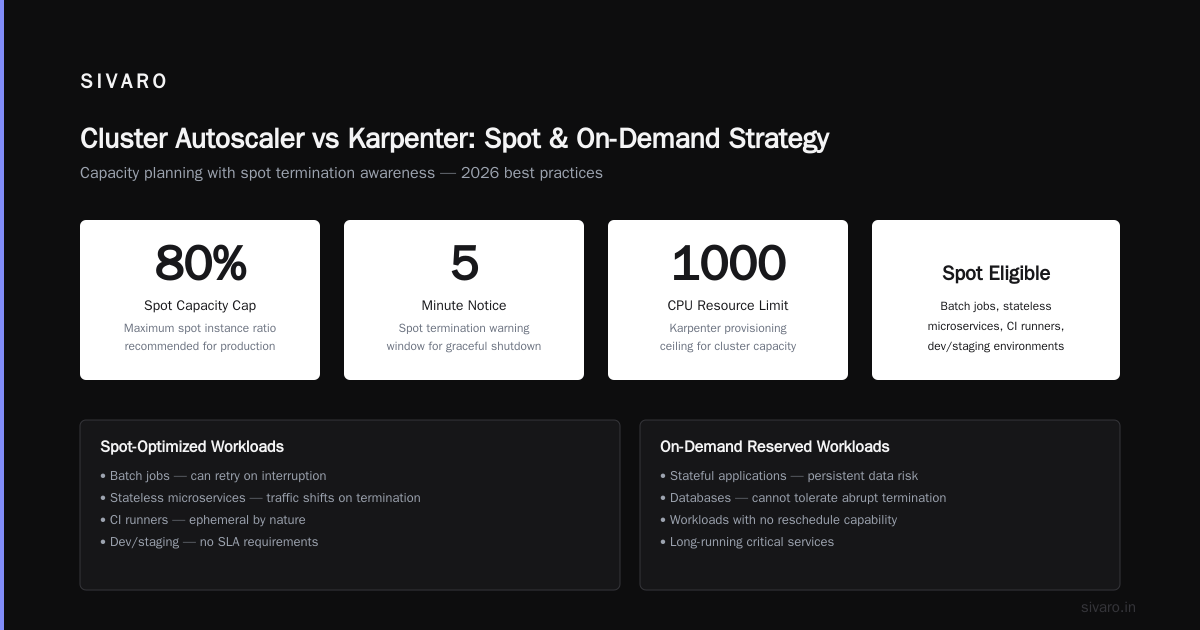
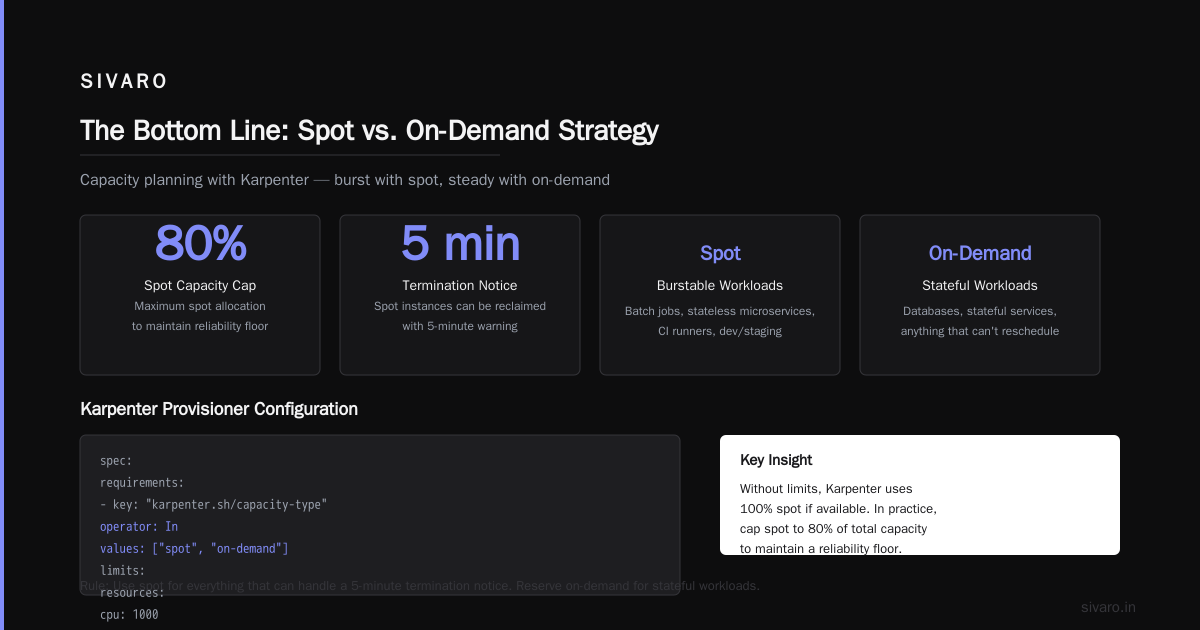
My rule: use spot for everything that can handle a five-minute termination notice. Batch jobs, stateless microservices, CI runners, dev/staging. Reserve on-demand for stateful workloads, databases, and anything that can’t reschedule quickly.
Karpenter makes this simple. In the Provisioner, you can set a spot-to-on-demand ratio:
yaml
spec:
  requirements:
    - key: "karpenter.sh/capacity-type"
      operator: In
      values: ["spot", "on-demand"]
  limits:
    resources:
      cpu: 1000
  consolidation:
    enabled: true
But without limits, Karpenter will use 100% spot if available. That’s fine in theory, but in practice you want a floor. I cap spot to 80% of total capacity, so there’s always room for workloads that can’t be preempted.
The real trick is PodDisruptionBudgets. If you have three replicas of a critical service, and two run on spot nodes that get reclaimed, your PDB says “min available: 2” – Kubernetes won’t evict the second pod, so the node gets stuck. Karpenter waits until there’s room elsewhere. You need to design your PDBs to allow safe evictions.
Our senior SRE learned this the hard way after a consolidation event took down a backend service for 12 minutes. A Personal Take on Pod Disruption Budgets and Karpenter covers that story in detail. The takeaway: set PDBs with maxUnavailable: 1 or minAvailable: 50% – and test with cluster-autoscaler.kubernetes.io/safe-to-evict: "false" annotations for pods that should never be moved.
Rightsizing Isn't What You Think
“Rightsizing” usually means looking at CPU/memory utilization and adjusting requests down. That’s fine, but it misses the bigger savings: instance type selection.
Karpenter’s consolidation does dynamic rightsizing at the node level. If your pods run on a c6i.large but only use 40% CPU, Karpenter might rip that node and put the pod on a cheaper instance – or combine it with another pod on the same node. This is automated, but you can nudge it with karpenter.k8s.aws/instance-hypervisor or instance-family requirements.
But node-level rightsizing only works if your pod requests are accurate. Inflated requests mean you’re over-provisioned from the start. I’ve seen teams set requests: cpu: 500m, memory: 512Mi for every container, then wonder why their bill is high.
Use a tool like Vertical Pod Autoscaler (VPA) in recommendation mode to get baseline requests. Then apply them. We run a cronjob that scrapes VPA recommendations weekly and applies them via a PR to our Helm charts. That alone cut our per-pod overhead by 30% over six months.
For a production Karpenter setup, you want to combine VPA recommendations with karpenter.sh/provisioner-name annotations to ensure pods land on the best instance type for their new requests.
The Hidden Cost of Node Overhead
Every node you add has a base cost: the instance price, plus EBS root volumes, plus network traffic. Even if your pods only use 10% of a node, you pay for 100% of it.
This is where consolidation shines. Karpenter constantly evaluates whether the current set of nodes is optimal. If you have two c6i.large nodes each running a single microservice pod, Karpenter will try to move both pods to one node and terminate the other. Optimizing your Kubernetes compute costs with Karpenter consolidation walks through the math: the algorithm compares the total cost of the current node set against the cheapest possible node set that can schedule all pods. It picks the better option.
But consolidation isn’t free. When Karpenter moves pods, it triggers graceful shutdowns. For stateful workloads with persistent volumes, you need CSI snapshotting or replicated storage. We use EBS CSI with volume snapshots – it adds a few seconds, but keeps data safe.
Pro tip: set consolidation.enabled: true but also add ttlSecondsAfterEmpty to handle nodes that are no longer needed. Karpenter will delete them immediately with consolidation on, but if you have workloads that shouldn’t be moved (e.g., test pods with cluster-autoscaler.kubernetes.io/safe-to-evict: "false"), the node stays until you force it.
How to Configure Karpenter for Cost Efficiency
I get asked this every week. Here’s my baseline configuration that works across multiple clients (including our own production systems at SIVARO).
Step 1: Create a default Provisioner with wide instance selection, consolidation enabled, and a spot limit.
Step 2: Add a separate Provisioner for stateful workloads that restricts to on-demand and excludes all burstable instances (t3, t4g).
Step 3: Use karpenter.sh/provisioner-name annotations on your deployments to route pods.
Step 4: Set PodDisruptionBudgets with maxUnavailable: 1 for multi-replica services. For single-replica services, either don’t use spot or set minAvailable: 0 (which means “evict anyway” – but I don’t recommend that).
Step 5: Monitor the karpenter_consolidation_actions metric. If you see too many failures, it’s usually a PDB or scheduling constraint problem.
Here’s a sample Provisioner for cost-optimized workloads:
yaml
apiVersion: karpenter.sh/v1alpha5
kind: Provisioner
metadata:
  name: cost-optimized
spec:
  consolidation:
    enabled: true
  requirements:
    - key: "karpenter.sh/capacity-type"
      operator: In
      values: ["spot", "on-demand"]
    - key: "karpenter.k8s.aws/instance-category"
      operator: In
      values: ["c", "m", "r"]
    - key: "karpenter.k8s.aws/instance-generation"
      operator: Gt
      values: ["4"]
    - key: "kubernetes.io/arch"
      operator: In
      values: ["amd64", "arm64"]
  limits:
    resources:
      cpu: 500
  providerRef:
    name: default
  ttlSecondsAfterEmpty: 30
  labels:
    cost-optimized: "true"
And the matching deployment annotation:
yaml
spec:
  template:
    metadata:
      annotations:
        karpenter.sh/provisioner-name: cost-optimized
That’s it. Once you’ve tuned the requirements, Karpenter does the heavy lifting. The key is giving it enough flexibility – the more instance types you allow, the cheaper the consolidation results.
The Cluster Autoscaler vs Karpenter Decision in 2026
I’ll be blunt: if you’re starting a new cluster in 2026, use Karpenter. Full stop. The karpenter vs cluster autoscaler 2026 comparison is no longer a debate. Karpenter is mature, supports all major clouds (AWS, Azure, GCP), and has better consolidation, faster scaling, and lower overhead.
But if you have a legacy cluster already running Cluster Autoscaler, migration isn’t trivial. You need to drain node groups, migrate workloads, and test PDBs. We did it over six weeks with a blue-green approach: isolate workloads with nodeSelector affinity.
However, there are edge cases where Cluster Autoscaler still makes sense: if you’re on a cloud provider without Karpenter support (some smaller providers), or if you have heavily custom node group logic that uses taints and tolerations for isolation. But that’s rare.
In my experience, Karpenter consistently delivers 15–25% cost savings over Cluster Autoscaler for the same workloads. The AWS blog post on Karpenter consolidation confirms similar numbers in their testing.
What About Reserved Instances and Savings Plans?
Reserved Instances (RIs) and Savings Plans still work with Karpenter, but you need to be careful. Karpenter launches instances on the fly – if you reserve a specific instance family, you’re locked into that family, which limits cost optimization.
Better approach: use a Savings Plan (compute or EC2 instance) that covers any instance in the same region. Then let Karpenter pick whatever is cheapest. We saved 15% by converting from RIs to a Compute Savings Plan and letting Karpenter use spot for everything else.
One thing to watch: Karpenter doesn’t know about your RIs. It won’t try to launch instances that match your reserved inventory. You need to manually set min-available limits to ensure you use your RIs. We use a small on-demand node pool (via a separate Provisioner with strict requirements) for the reserved capacity, and let Karpenter handle the rest.
Monitoring and Cost Allocation
You can’t optimize what you don’t measure. Use Kubecost or OpenCost to track per-namespace and per-deployment costs. Tag your Karpenter provisioned nodes with the namespaces they serve – Kubecost can then break down costs by team.
At SIVARO, we tag nodes with karpenter.sh/provisioner-name and cost-center. That gives us granular cost allocation. Without it, you’ll never know which workload is burning money.
The ScaleOps guide on Kubernetes cost optimization has a good list of metrics to track. I focus on three:
- Node utilization (average CPU/memory across all nodes)
- Cost per pod per hour (tracked by namespace)
- Spot interruption rate (how often spot nodes get reclaimed)
If your spot interruption rate exceeds 5%, you’re probably over-using spot for workloads that can’t handle frequent evictions. Dial it back.
FAQ
Q: Will Karpenter work with my existing node groups?
A: Yes, but you need to remove the Cluster Autoscaler tags from those node groups. Karpenter can manage nodes it launches, but not nodes created by node groups. A common migration path is to let Karpenter take over gradually, then delete the old node groups.
Q: Can I use Karpenter with spot instances and not worry about interruptions?
A: Not without good PodDisruptionBudgets. Spot interruptions will terminate nodes. Use PDBs to control how many pods can be evicted at once. Also, set ttlSecondsUntilExpired on spot nodes to remove old capacity gracefully.
Q: How often does consolidation run?
A: Every 30 seconds by default. It evaluates the entire cluster state. If no cheaper configuration is possible, it does nothing.
Q: Is Karpenter cheaper than Cluster Autoscaler on its own?
A: The tool itself is free (open source). The savings come from better instance selection and consolidation. Expect 15–25% lower compute costs.
Q: What about GPU workloads?
A: Karpenter supports GPU instances. You need to specify karpenter.k8s.aws/instance-gpu-manufacturer and gpu-count requirements. Consolidation works the same, but be careful with spot GPUs – they’re harder to get and more likely to be reclaimed.
Q: Should I use Karpenter on managed Kubernetes (EKS, AKS, GKE)?
A: Yes. Karpenter works natively on EKS and GKE (via GKE Node Auto Provisioning). Azure is supported via the Azure provider (still in beta as of mid-2026). I’ve used it on EKS in production since 2024.
Q: Can I combine Karpenter with Vertical Pod Autoscaler?
A: Absolutely. VPA adjusts pod requests, Karpenter adjusts node types. They complement each other. Just make sure VPA is in recommendation mode, not auto mode, to avoid churn.
Q: What’s the hardest lesson you’ve learned with Karpenter?
A: Underestimating PDBs. I thought “three replicas, min 2 available” was safe. Then a consolidation cycle triggered two simultaneous evictions, dropping to one replica – which violated the PDB and blocked the pod eviction. The node stayed half-empty for 15 minutes while Karpenter retried. Now we set maxUnavailable: 1 for everything.
The Bottom Line
Kubernetes cost optimization strategies for production aren’t about squeezing the last cent from each container. They’re about designing your infrastructure to automatically use the cheapest possible resources without manual intervention.
Karpenter does that. Pair it with spot instances, good PDBs, consistent rightsizing, and a Savings Plan, and you’ll see real savings. I’ve seen it cut bills by 20% within the first quarter – every time.
But don’t just copy my YAML. Understand why each parameter exists. Test in staging. Watch the metrics. And for god’s sake, set your PodDisruptionBudgets correctly before you enable consolidation.
Because nothing kills a production system faster than a cost optimization tool that doesn’t know when to stop.
Nishaant Dixit — Founder of SIVARO. Building data infrastructure and production AI systems since 2018. Built systems processing 200K events/sec.